Showing posts with label Stampin Up. Show all posts

Wednesday, November 15, 2017

STAMPARATUS is HERE! Reserve yours!


NEW Stamparatus Coming In 2018!  The NEW Stamparatus is certain to be the must-have stamping tool for 2018!  If you want an easy way to get perfect stamp placement, you will LOVE this amazing product!  There are other brands out there offering similar products, but the Stamparatus combines all of the top benefits and improves on them!  It will be a breeze to create perfectly positioned images, to quickly stamp multiple projects, to easily stamp multi-step images, and to re-stamp images that need a little more ink. Once you try it, you won't know how you stamped without it!


My Favorite Stamparatus Features:
  • Two removable & reversible plates give you the ability to stamp 2-step, 3-step or 4-step images quickly and accurately, over & over!
  • Grid lines on the base and on the plates help you line up stamps perfectly!
  • Two open sides accommodate any size of card stock!
  • Can be used with both clear mount and photopolymer style stamps!
  • Strong & slim bar magnets help hold your paper in place, and they store on the bottom!
  • Only $49.00!
RESERVE Your Stamparatus Tomorrow, November 16—You'll be able to reserve the NEW Stamparatus positioning tool beginning on November 16. This is a global launch for both demonstrators and customers, and the reservation periods are designed to prevent the possibility of backorders.  There are three reservation windows, and quantities during each period are available while supplies last only.  Don't wait!
Reservation Windows:
  • November 16-30—Product ships approx. February 1, 2018
  • December 5-30—Product ships approx. March 19, 2018
  • January 15-30—Product ships approx. April 15, 2018
How Does The Reservation Process Work?  Starting tomorrow, you'll be able to reserve your Stamparatus at my Online Store.  You will see a reservation link on the Stamparatus product page.  You'll need a customer account and a credit card number for your reservation, but your card will not be charged until the product ships next year.  Once it becomes available, you will be asked to go back into your account to complete your order.  At that time, you'll be able to add other products to your order.  When you finalize your order, you'll also be able to earn Stampin' Rewards, add a Host Code, and/or qualify for Sale-a-Bration promotional items that will be available from Jan 5 through March 31.  See complete details: Stamparatus FAQs PDF.
FREE Embellishments With Reservation With Me!  Reserve your NEW Stamparatus from my Online Store during the November 16-30 reservation window and I'll send you a FREE Grab Bag of embellishments valued at least $15!  This is an exclusive offer from Jessica Strange, The Primrose Stamper and reservations must be placed through my online store between November 16-30.  Grab bag will be mailed out after payment for your order in 2018.  

Friday, September 22, 2017

Harry Potter inspired Patronus Card

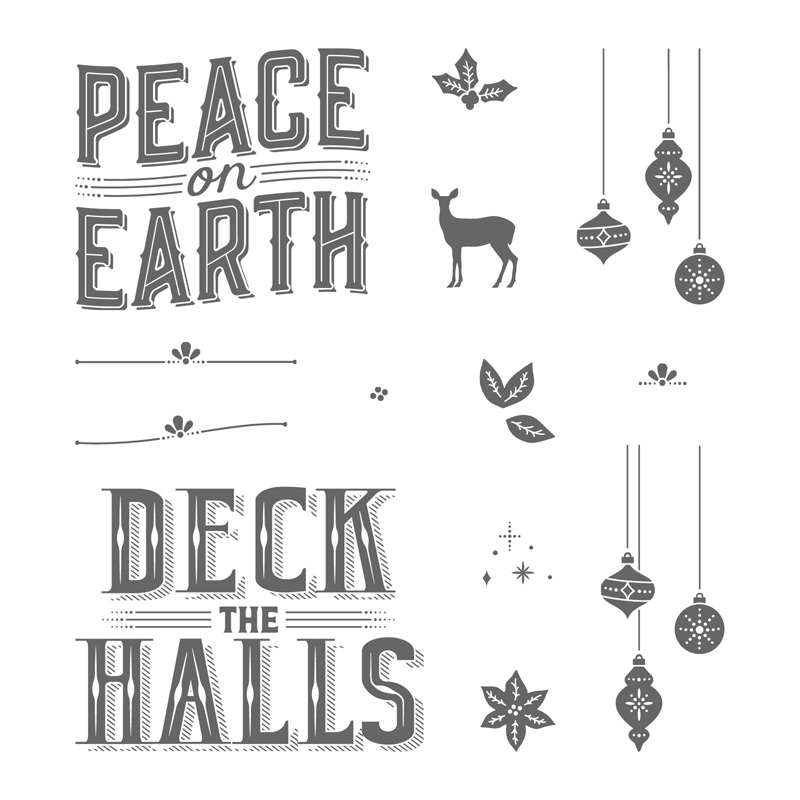
Hey there! I just had to share this card with you. I was playing with the stamp set Carols of Christmas and had a brain wave. Like, a knock you out of your seat idea!
That little deer looks like a Patronus!

A Patronus Card made with the Carols of Christmas stamp set by Stampin' Up!

So, I played around with some watercoloring with Pool Party and Night of Navy ink on Watercolor Paper to get the color right, and heat embossed the deer and stars with White Embossing Powder to make it a bold, crisp white.


A Patronus Card made with the Carols of Christmas stamp set by Stampin' Up!


The "Always" sentiment is made with the Brushwork Alphabet stamp set. After stamping it, I brushed over it with the Aqua Painter to blur the letters a little, then cut it with the Layering Ovals Framelits Dies. The Silver Glimmer Paper just finished off the whole look. I just love how it turned out, and I hope it adds a bit of magic to your day.

Check out the list of supplies used below!

Happy Stamping!
Jessica


Wednesday, September 20, 2017

Stampin' Write Marker Insert for Clear Case

I have recently cleaned up, and reorganized, my stamping studio to get ready for the new Stampin' Up! year. As I was doing that, I realized that the bag I was storing my Stampin' Write Markers in just wasn't working for me. So, I put them in our Clear Mount Stamp Cases, which are just $6 for the 4 of them. Now they are grouped together by color family, easy to get to, and take up much less space than in that bulky bag. I also made inserts to put inside the case to keep track of what colors are inside. And you can have them too! I have a link including all 4 color collections. They are ready for you to print, cut, insert, and done!


Stampin' Write Marker Insert for Clear Case! Free Download!


Cutting Tips: Cut along the INSIDE of the black cutting marks for the best fit.

DOWNLOAD THE MARKER INSERTS HERE!

Enjoy the inserts!

Happy Stamping,
Jessica


Friday, September 15, 2017

Pink Ruffled Card with Just Add Text & Flower Shoppe Stamp Sets

We made this card in my monthly card class, and I have to say, I love the New Ruffles Embossing Folder! It is to pretty! One this I noticed when using it was that the ruffles look right if you use the folder upside down, with the fold (or hinge) of the folder on the bottom. And with it being a Dynamic Textured Impressions folder, you only need to use one cutting plate when running it through the Big Shot.


Pretty Pink Ruffle Card made with the Just Add Text & Flower Shoppe stamp sets from Stampin' Up! Video tutorial on the blog post!

Powder Pink is such a pretty pink, that I decided to make it the feature color on this card and only pair it with Very Vanilla. The Clear Faceted Gems add just the right amount of bling to the centers of the Flower Shoppe flowers.

Here is a video tutorial of how I made this card, and a list of supplies used listed below the video.


Thanks for stopping by!

Happy Stamping!
Jessica

Tuesday, August 1, 2017

The August Shopping Bonus Is Here!

August Shopping Bonus!


Boxwood Wreath Embellishments! 
12 cute, little wreaths you can leave round or unwrap to make a long garland to add great texture your projects!

PLACE A PRODUCT ORDER OF $50 or more (before shipping and tax) in my online store this month and you can earn the Boxwood Wreath Embellishments FREE. Bookmark this page to have this month's required host code ready to add to your online order.


HOW TO EARN MY FREE BONUS GIFT THIS MONTH:
  • $50 - $149.99 ORDER:  ADD HOST CODE, X3GZQCAQ for orders over $50 and under $150 (before tax and shipping). To claim your bonus gift from me, you MUST include this host code. Example below on where to add your host code when ordering online.
  • $150+ ORDER: PLEASE DO NOT ADD THE HOST CODE. You will automatically qualify for the free bonus gift, Boxwood Wreath Embellishments, as well as earn Stampin' Rewards.  
Don't forget to check the Stampin' Up! Clearance Rack and 10% OFF Product Bundles for extra savings.
  
DEADLINE IS August 31st.


IMPORTANT NOTE:  My FREE bonus gift giveaways are mailed separately from any order and will arrive mid-month following when it was earned.


THIS MONTH'S HOST CODE IS:  
X3GZQCAQ
*This is a different code than codes for other classes/club. Do NOT use this one with class/club orders! Please use this code ONLY for this Bonus Gift order.*


WHERE TO APPLY THE HOST CODE TO YOUR ORDER
  • Add items to your shopping bag.
  • Click the shopping bag link.
  • Enter the host code(X3GZQCAQ)in the box, then click apply.
  • Please be sure you are adding the host code to the host code field and not the coupon code field (see screen shot below).


Monday, July 31, 2017

Rustic Carols of Christmas Card

I just love this card! I had such a good time making it for my team to make at our monthly meeting. Our monthly meetings have to be one of my favorite events each month. I love getting together with my stamping friends to stamp and share what we've done throughout the month, and show them ways to grow their stamping!

Rustic Christmas Card made with the Carols of Christmas stamp set be Stampin' Up!

Rustic Christmas Card made with the Carols of Christmas stamp set be Stampin' Up!

Can you see the bit of sponging around the greeting and the loops of Copper Thread? I love the subtle little touches like that.


And a video on how I made it. There is a supply list below the video, so be sure to check that out too. You can get any of those supplies, or anything else you might need, through my online store just by clicking on the image of the item.


Happy Stamping!


Friday, July 28, 2017

Carols of Christmas card in Night of Navy

At my team meeting we always make projects using new or upcoming products, and this month was no different! We made 4 cards, and this was one of them.

Make this cute card with the Carols of Christmas stamp set and Card Front Builder Thinlet dies by Stampin' Up!

I loved the glitz of the Dazzling Diamonds Glimmer Paper and Silver Ribbon combined with the Night of Navy cardstock. The greeting is so bold you don't really need much around it to make a great card!


Here is a video showing how I made it.


And here are the supplies I used:

Monday, June 5, 2017

New Ribbon and Designer Series Paper SHARE!


The new catalog is FULL of beautiful new designer papers and ribbons, and I want them ALL!!  So, I'm doing some product shares so "we" can get them all!  It's a great way to get a sampling of everything so you can decide what you really, really like!

Here are the details:

Collect 49 new ribbons

and 66 new designer papers!

Ribbon Share: 49 yards of Brand New ribbons!! Only $42.50 plus $6 shipping!  Or you can pick it up from me for no shipping cost!
You would spend over $400 to purchase each of the new ribbons!  This way you can "try before you buy"!

Each ribbon share needs 10 people.  As soon as I have ten I will start a NEW rsvp link for group 2 and so on.  So, if it says the event is full, contact me for the new link!
If we don't have enough participation your payment will be refunded.
BONUS: Receive a FREE roll of new Baker's Twine!


Designer Series Paper Share: 66 sheets of 6x6 Designer Series Paper from the New Catalog! Only $21 plus $6 shipping!  Or you can pick it up from me for no shipping cost!
You would spend over $150 to purchase each of the new 12x12 designer papers!  This way you can "try before you buy"!

Each paper share needs 8 people.  As soon as I have 8 I will start a NEW rsvp link for group 2 and so on.  So, if it says the event is full, contact me for the new link!
If we don't have enough participation your payment will be refunded.
BONUS: Receive 20 sheets of 6x6 retired designer paper!  (*Variety will vary per person.)

Click here to reserve your spot in the paper share!

**If you sign up for BOTH SHARES, only choose the shipping on ONE - I will combine them into ONE packet for you!!**

Tuesday, August 4, 2015

June Paper Pumpkin Alternate Projects

After posting yesterday I realized I had completely forgotten my June Paper Pumpkin samples!  Whew, five kids can make a person very forgetful! I squealed in delight when I opened this kit, I love the flower card to pieces! But, without further ado, here is what I made with my June kit...


Here are the cards as designed to be made. So cute I almost didn't want to make anything else!


This is the first set of Project Lift cards I made. I added the envelope liners as Designer Series Paper to some of the cards, and made my own little 3"x 4" envelope to keep things in. On the Kraft cardstock I stamped the big flower to make an all-over pattern. I punched the little banner out of the patterned stickers with my Banner Punch and they were so easy to put in place on the twine. With a little Wild Wasabi and Calypso Coral  cardstock these pocket cards were ready in no time! 
I made this darling little bag by stamping the large flower all over a card base in Tip Top Taupe ink, adding the envelope liner to the top, scoring it 3/4" from the center fold line, and folding the new score lines to make the bag. The twine made perfect handles, and that flower is to die for! I just love this little bag!

For these Project Life cards I used the other cards design in the kit. I just love the wooden accents, don't you? I even used the negative of the accents to make the upper Pool Party 3"x 4" card. The stickers made it so easy to make the cards for this layout! I used some Bermuda Bay, Pool Party, and Tip Top Taupe cardstock along with the envelope liners as well.  

  Isn't this banner party ready?! I want to plan a party just to put it up! I used two of the envelope liners, three of the envelopes, and two of the cards to make it. The Bermuda Bay, Wild Wasabi, and Pool Party stars are die cut with the Stars Framelits, and the letters are stamped Tip Top Taupe ink with the Larger Than Life photopolymer stamp set on Whisper White cardstock and punched with the 2" Circle Punch. I added the wooden star accents and then popped the punched circles up with Dimensionals. Cute, fast and easy!


Monday, August 3, 2015

July Paper Pumpkin Alternate Projects

I wanted to post these pictures before I forgot all about them! These products are so cute. I especially love them because I'm a big tea and coffee drinker myself. I mean, who isn't really?


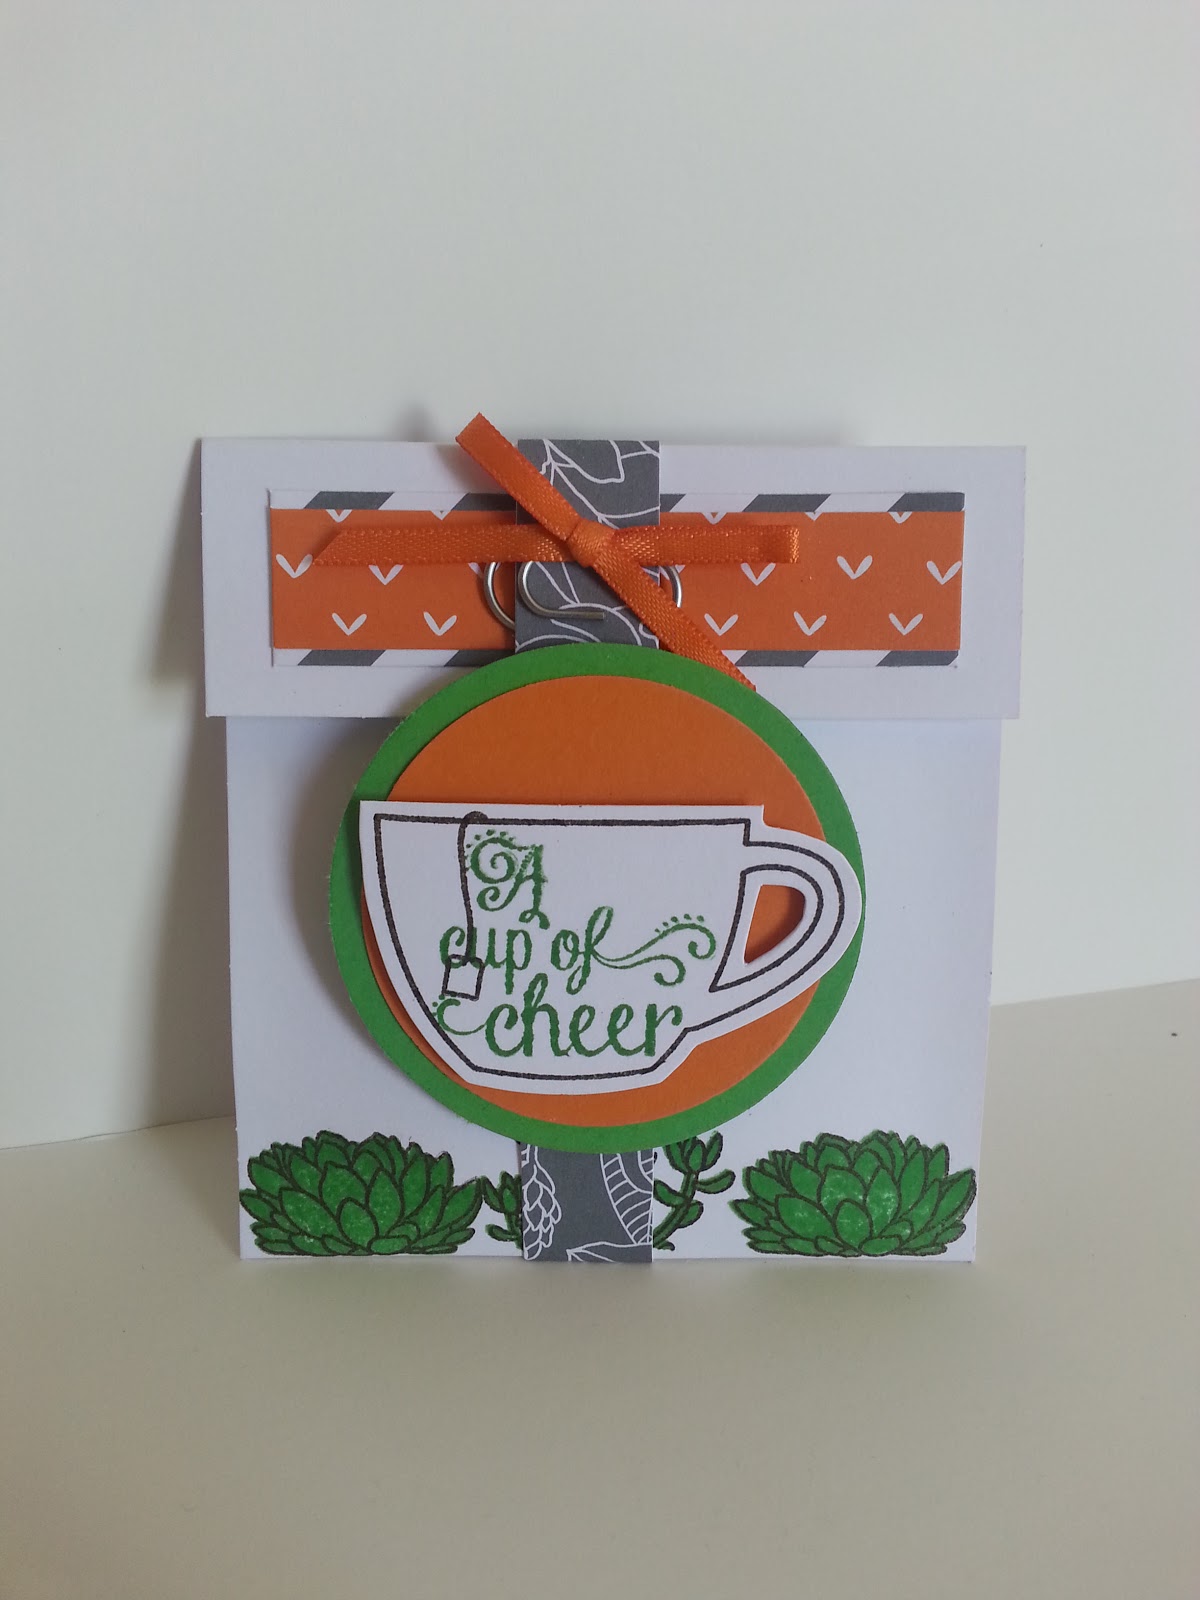
So here is how the kit was intended to be used. A cute little card with a little teacup, and maybe even a little succulent inside. The two-step stamping was so easy with the photopolymer stamps. Just stamp the Early Espresso outline, and then stamp the Cucumber Crush on the inside!


For this card I added a little extra cardstock in Pumpkin Pie and Cucumber Crush behind it. Then I stamped the teacups and the sentiment, and popped them up with dimensionals. The little pennant on the side is made with the stickers that cam in the kit. I trimmed the orange one down a little after layering it on the gray, then added the bow clip. So cute and so easy!


I made this cute little gift pouch with a card base. I just trimmed it down, scored the top flap and the bottom fold, and closed up the sides with some snail. After that I just stamped the succulents, put the tea cup onto two punched circles, and attached that to a 1/2" wide strip of the Designer Series Paper to make a belly band. Doesn't it looks so nice with my favorite tea?


Now that we've made a little tea gift, it's time for coffee gift! I made this box by cutting down a card base again, doing a little scoring, and just folding it up to make a little box. After folding it, I added some of the included Designer Series Paper to the front and the little teacup saying Thanks a Latte. The coffee is in one of our gusseted bags that I tied shut with Whisper White Baker's Twine and added the little bow clip over it.

Aren't these little Project Life cards darling? I just love the little tea cup with water coloring behind it. I just took my Aqua Painter, swiped it through some Cucumber Crush ink, and painted it on the card and little tea tag. I did the same kind of thing to make my tea rings! I just tapped a plastic cup in my Early Espresso ink and pressed it onto to the card, then painted over it with the Aqua Painter. These little cards are sure to make any album very cheerful!


Thanks for stopping by to check out what I did with July's Paper Pumpkin Kit!
Happy Stamping,
Jessica

Thursday, June 25, 2015

Weekly Deals for June 23-29, 2015

Check out this week's deals! I sure love the Glimmer Paper! And check out the deal on the Mini Treat Bag Thinlits!


Click HERE to get these items before the sale is over on the 29th! I will send everyone that orders $50 or more gets a package of rhinestones for free, and $100 orders get the rhinestones and pearls! After adding you first item, click view shopping bag an enter this hostess code CEMSCESR .

Wednesday, June 24, 2015

June Paper Pumpkin


Oh my goodness.

That was the first thing I said when I opened this month's pretty red box. The projects are adorable! I couldn't wait to put it together!

 I love the cute flower accent on this one! Everything is just wonderful! It was so quick and easy to put together, too. The patchwork part is done with thick stickers that are repositionable until pressed down, so you can adjust them if they are a little crooked. Make sure to pay attention to the white piece, one side is shorter and goes on top. To do the twine on the back of the flower, just wad it up in your hand and stick it down with your SNAIL adhesive. So easy!

Isn't this one cute?! I love the little pennants. They are thick stickers too, and go on the small white banner. I would suggest starting at both the top and bottom when sticking them on, and working your way to the middle, for even spacing. I started at the bottom only and had to cut some of the top off of the little banner. For the wooden embellishments, use an Exacto knife, or the tips of sharp scissors, to cut through to tiny tabs holding it in the sheet. They are very thin and pushing them through with your finger can cause them to break. There are instructions on how to put the long, skinny envelope together correctly, so be sure to read those first.


If you like this kit and want to start getting your own, click HERE. You can sign up for just $19.95+tax at anytime! Each month you will get a package of creativity mailed to your door, with pre-planned and pre-cut projects for you to stamp and assemble. They are quick, easy and fun, great for new and seasoned stampers alike! Current subscribers can also get past kits, like this one, while supplies last. Don't wait, you don't want to miss next month's kit!

Check back later for other projects I made with this kit!

Happy stamping!
Jessica

Thursday, January 8, 2015

Sale-A-Bration is here!


What is Stampin' Up!'s Sale-A-Bration?

It's only the biggest sale of the year!!

There are THREE AWESOME BENEFITS during Sale-A-Bration - January 6 through March 31, 2015.

1. FREE gift with every $50 spent, no limit!!  Spend $100 get two, and so on!
2. TWO FREE GIFTS when you purchase the Starter Kit!!  Or, you can choose one project kit from the Occasions Catalog!  The kit is $99 and you choose $125 in ANY current merchandise you want!
3. $25 MORE in FREE merchandise when you host a qualifying party!

Don't delay!!  Book your home party with me now!  I will come do all of the work, you get the benefits!  Plus, you and your friends get to make some cute projects!  I have many different types of parties to choose from.  Free parties, private classes brought to you, memory keeping class, and more!  Ask me for more info!

And, if you are thinking about getting the Starter Kit, GET IT NOW so you can take full advantage of Sale-A-Bration as a demonstrator - discount, earning extra income, and more!

Here are some samples from the Sale-A-Bration Set, Lotus Blossom.  Most are inspired from Pinterest!


Wednesday, November 26, 2014

Online Extravaganza! A huge sale just for you!


Stampin' Up! is having an Online Extravaganza Sale AND the Starter Kit is on sale!!

What a great week!

First:
There are some GREAT DEALS - including some $5 Embossing Folders, Project Life Bundle, Blendabilities Bundle, Gift Box Punch Board, and more!  You can order the specials online HERE anytime during the special.  And I'm having a Mystery Hostess! When you are placing your order online, use the hostess code 2NPE9NP3  to be entered to win the hostess rewards! For every $1 you spend on merchandise (tax and shipping not included) you will get 1 point toward the hostess rewards. Example, if you place a $50 order you will receive 50 points. Whomever has the most points at the end of the sale will win the hostess rewards! Make sure you use the hostess code 2NPE9NP3 to be entered! Multiple orders throughout the sale count too!


CLICK HERE TO VIEW all of the specials!  Notice the November 24 and December 1 ONLY specials, too (they are while supplies last)!

Second: 

The Starter Kit is only $75 plus tax (so about $81 total) from November 24-Dec 2, 2014 only!!

And, there's a bonus! You will receive 35% off of your first order of $150 or more in December (optional, you do NOT have to order)!!

You choose $125 in ANY CURRENT MERCHANDISE YOU WANT - EVEN SALE MERCHANDISE!! 

Example: Choose the $100 Blendabilities Bundle MONDAY DECEMBER 1 ONLY and receive $143 worth of Blendabilities PLUS another $25 in merchandise of your choice!  
That's a $200 VALUE for only $81!  That's just one example!

**If you choose $125 in regular merchandise that is not on sale, that  is still a $149 value if you add in the tax & shipping you would pay for only $81 total!  Example: choose the Big Shot plus another $25 in merchandise!

It's a no-lose deal! If you purchase the kit and do nothing with it, no problem. There are no penalties or requirements. But, if you choose to get a discount, earn some extra income, or both, that's great, too!

Get your kit here November 24-December 2, or just contact me and I can help you get it!

Make sure you pick your $125 in merchandise before you go online to order!

Let me know if you have any questions.

Thursday, August 28, 2014

Last day for the Kit Special!

TODAY is the last day to get $150 worth of your favorite things (even for the just now active Holiday Catalog) for just $99 (plus tax and shipping is free!)

The kit is a great way to start earning some extra cash for the holiday shopping coming up! Wouldn't it be nice to put on stamping parties with friends for your "extra job"? It's been my favorite "job" for a few years now!

And if, that's not your thing, then you can use it to constantly get your favorite stamping things at a 20% discount! What a great way to keep on with your hobby!

I welcome all kind of stampers to my group, and would love to help you make this Kit how you want it to be! Don't wait too long, it ends today!

Friday, August 22, 2014

$150 of your favorites for just $99


Stampin' Up! just announced a one week kit special!


For $99 plus tax only, you can choose $150 in ANYTHING you want
(current merchandise)!


Been thinking about being a demonstrator?
Want a discount on your own purchases?
Only want to take advantage of $150 for $99 and do nothing else (no commitment)?


If you answered yes to any of these, then this deal is for you! Still not sure and need a few more reasons? Check out my group page to see some great reasons why you'll love it!


Yes, you will technically be a "demonstrator" until at least January 31, 2015 even if you do nothing. During that time, you will get a minimum 20% discount on all purchases, receive the bi-monthly demonstrator magazine, have access to Stampin' Connection - the demonstrator only idea website, and more!


You can also attend monthly demonstrator only gatherings and participate in cards swaps if you want!


Let me know if you have any questions. Or go to my website Aug 21-28 and get your kit!

Happy Stamping!

Sunday, August 3, 2014

Perfect Peacock Birthday

I went to our monthly group meeting last night, where we always have a swap. I thought I'd share with you what I made!

I just love the Perfect Peacock stamp set! However,  I was out of whisper white card stock to stamp and color the whole image on. Sigh.... So, I had to get creative! **enter sarcastic "oh, darn!" here**

So, I used crumb cake for my base, and stamped the image in black. I stamped it again on white scraps I had laying around and colored it in with my Blendabilities markers. Then I punched it out with the 2 1/2" circle punch. I carefully lined the image up over the uncolored one on crumb cake, and stuck it on with dimensionals. That created a bright focal point, which we call the Spotlighting Technique. I then used the sentiment from Apothecary Art, punched the edges with the Banner punch, and added rhinestones for some bling.
Ta da! A beautiful card!