Showing posts with label card kits. Show all posts

Tuesday, August 4, 2015

June Paper Pumpkin Alternate Projects

After posting yesterday I realized I had completely forgotten my June Paper Pumpkin samples!  Whew, five kids can make a person very forgetful! I squealed in delight when I opened this kit, I love the flower card to pieces! But, without further ado, here is what I made with my June kit...


Here are the cards as designed to be made. So cute I almost didn't want to make anything else!


This is the first set of Project Lift cards I made. I added the envelope liners as Designer Series Paper to some of the cards, and made my own little 3"x 4" envelope to keep things in. On the Kraft cardstock I stamped the big flower to make an all-over pattern. I punched the little banner out of the patterned stickers with my Banner Punch and they were so easy to put in place on the twine. With a little Wild Wasabi and Calypso Coral  cardstock these pocket cards were ready in no time! 
I made this darling little bag by stamping the large flower all over a card base in Tip Top Taupe ink, adding the envelope liner to the top, scoring it 3/4" from the center fold line, and folding the new score lines to make the bag. The twine made perfect handles, and that flower is to die for! I just love this little bag!

For these Project Life cards I used the other cards design in the kit. I just love the wooden accents, don't you? I even used the negative of the accents to make the upper Pool Party 3"x 4" card. The stickers made it so easy to make the cards for this layout! I used some Bermuda Bay, Pool Party, and Tip Top Taupe cardstock along with the envelope liners as well.  

  Isn't this banner party ready?! I want to plan a party just to put it up! I used two of the envelope liners, three of the envelopes, and two of the cards to make it. The Bermuda Bay, Wild Wasabi, and Pool Party stars are die cut with the Stars Framelits, and the letters are stamped Tip Top Taupe ink with the Larger Than Life photopolymer stamp set on Whisper White cardstock and punched with the 2" Circle Punch. I added the wooden star accents and then popped the punched circles up with Dimensionals. Cute, fast and easy!


Monday, August 3, 2015

July Paper Pumpkin Alternate Projects

I wanted to post these pictures before I forgot all about them! These products are so cute. I especially love them because I'm a big tea and coffee drinker myself. I mean, who isn't really?


So here is how the kit was intended to be used. A cute little card with a little teacup, and maybe even a little succulent inside. The two-step stamping was so easy with the photopolymer stamps. Just stamp the Early Espresso outline, and then stamp the Cucumber Crush on the inside!


For this card I added a little extra cardstock in Pumpkin Pie and Cucumber Crush behind it. Then I stamped the teacups and the sentiment, and popped them up with dimensionals. The little pennant on the side is made with the stickers that cam in the kit. I trimmed the orange one down a little after layering it on the gray, then added the bow clip. So cute and so easy!


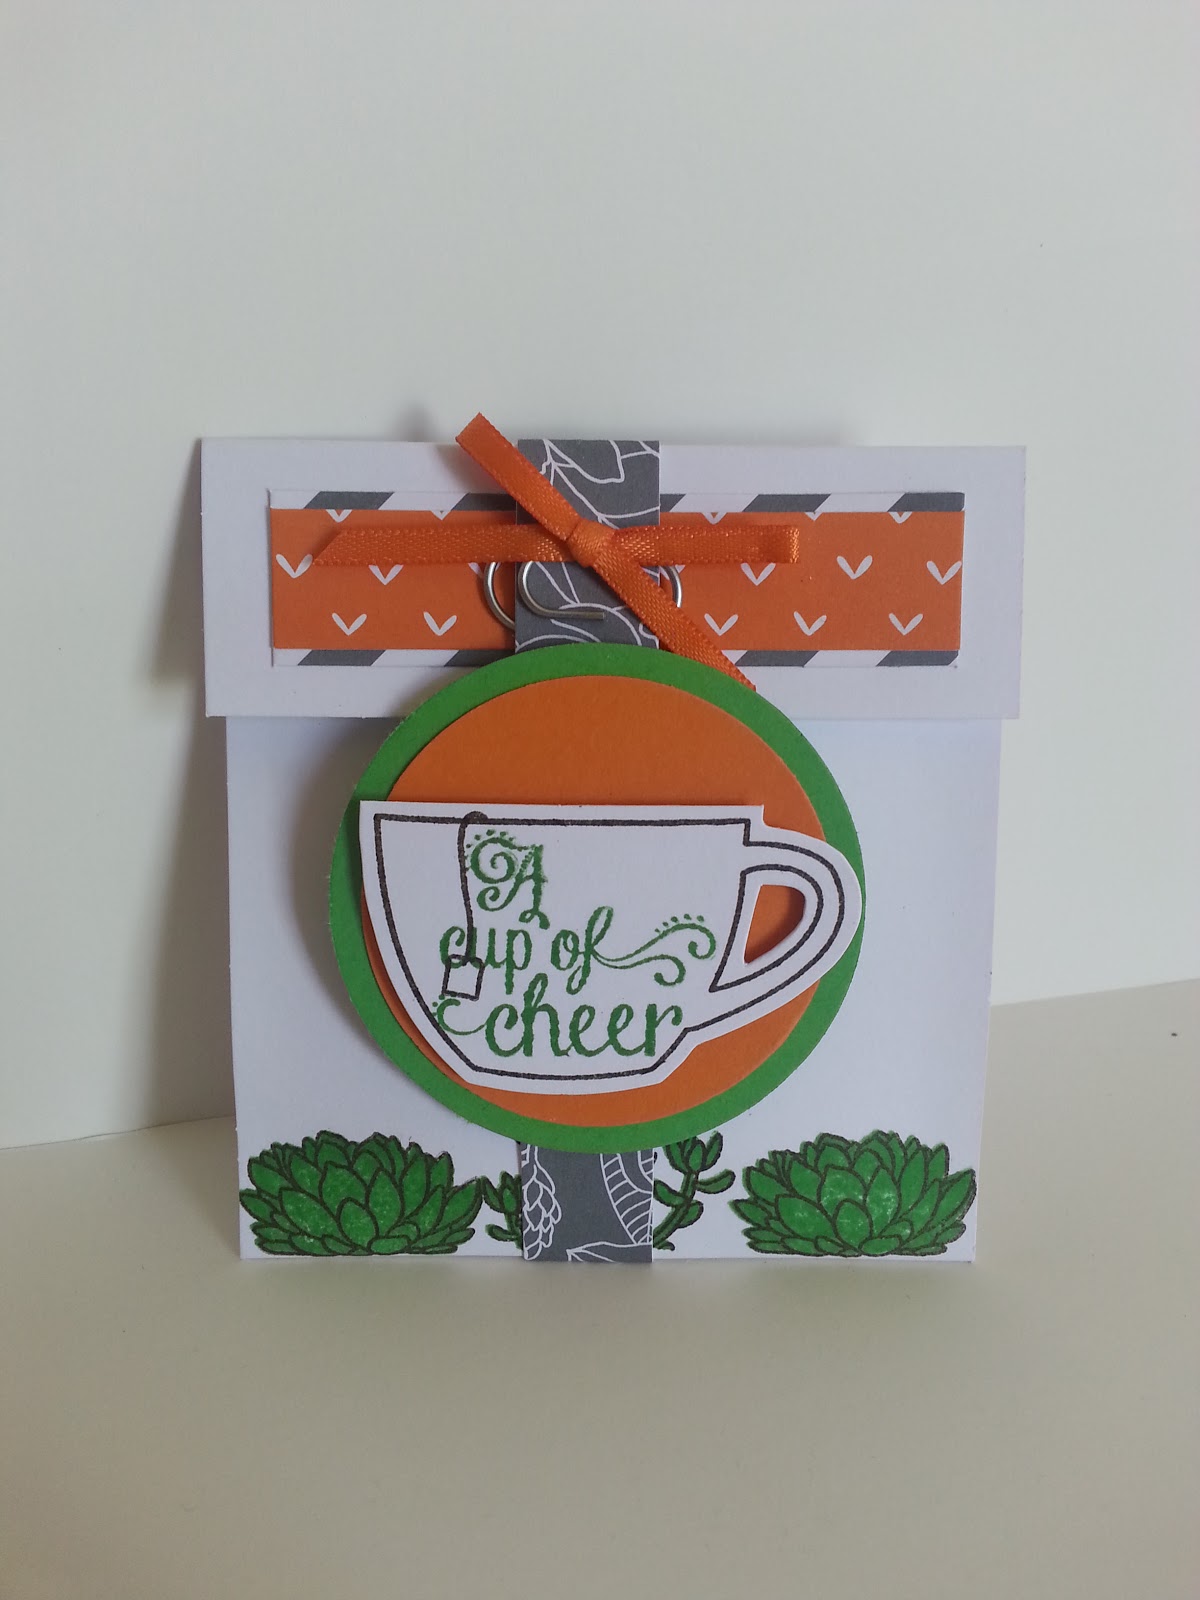
I made this cute little gift pouch with a card base. I just trimmed it down, scored the top flap and the bottom fold, and closed up the sides with some snail. After that I just stamped the succulents, put the tea cup onto two punched circles, and attached that to a 1/2" wide strip of the Designer Series Paper to make a belly band. Doesn't it looks so nice with my favorite tea?


Now that we've made a little tea gift, it's time for coffee gift! I made this box by cutting down a card base again, doing a little scoring, and just folding it up to make a little box. After folding it, I added some of the included Designer Series Paper to the front and the little teacup saying Thanks a Latte. The coffee is in one of our gusseted bags that I tied shut with Whisper White Baker's Twine and added the little bow clip over it.

Aren't these little Project Life cards darling? I just love the little tea cup with water coloring behind it. I just took my Aqua Painter, swiped it through some Cucumber Crush ink, and painted it on the card and little tea tag. I did the same kind of thing to make my tea rings! I just tapped a plastic cup in my Early Espresso ink and pressed it onto to the card, then painted over it with the Aqua Painter. These little cards are sure to make any album very cheerful!


Thanks for stopping by to check out what I did with July's Paper Pumpkin Kit!
Happy Stamping,
Jessica

Wednesday, June 24, 2015

June Paper Pumpkin


Oh my goodness.

That was the first thing I said when I opened this month's pretty red box. The projects are adorable! I couldn't wait to put it together!

 I love the cute flower accent on this one! Everything is just wonderful! It was so quick and easy to put together, too. The patchwork part is done with thick stickers that are repositionable until pressed down, so you can adjust them if they are a little crooked. Make sure to pay attention to the white piece, one side is shorter and goes on top. To do the twine on the back of the flower, just wad it up in your hand and stick it down with your SNAIL adhesive. So easy!

Isn't this one cute?! I love the little pennants. They are thick stickers too, and go on the small white banner. I would suggest starting at both the top and bottom when sticking them on, and working your way to the middle, for even spacing. I started at the bottom only and had to cut some of the top off of the little banner. For the wooden embellishments, use an Exacto knife, or the tips of sharp scissors, to cut through to tiny tabs holding it in the sheet. They are very thin and pushing them through with your finger can cause them to break. There are instructions on how to put the long, skinny envelope together correctly, so be sure to read those first.


If you like this kit and want to start getting your own, click HERE. You can sign up for just $19.95+tax at anytime! Each month you will get a package of creativity mailed to your door, with pre-planned and pre-cut projects for you to stamp and assemble. They are quick, easy and fun, great for new and seasoned stampers alike! Current subscribers can also get past kits, like this one, while supplies last. Don't wait, you don't want to miss next month's kit!

Check back later for other projects I made with this kit!

Happy stamping!
Jessica

Saturday, January 18, 2014

FREE Markers!


That's right! Get free Stampin' Write Markers when you join Paper Pumpkin by Feb 10. As if that isn't reason enough to join, I have another one for you. Join by Jan 25, and I'll send you a case to store all of your awesome new stamps and ink in, and a set of cards to make with your new stamps and ink! So much fun in one little special.
So, here is the fine print about Paper Pumpkin.
  • It's cheap:  A Paper Pumpkin membership is $19.95 per month (and shipping is included!)  There's no commitment, you can cancel your monthly Paper Pumpkin at anytime. You can also skip a month if you want. 
  • It's exclusive:  Each month we send you a unique, surprise kit with a project-cards, journals, décor, and more! (We've even color-coordinated, measured, and cut everything for you!
  • It's all ready:  Each kit includes stamps, ink, paper, and accessories-everything but adhesive. 
  • It's fast and fun:  Each kit gives you a 30-minute creativity escape. 
  • It's easy:   We will ship your Paper Pumpkin on or around the 15th of the month. You need to sign up for a kit by the 10th of the month to get that month's kit. If you sign up on the 11th of the month, your first kit will come the next month. (Let's say you sign up on May 10, we'll send your kit around May 15. If you sign up on May 11, we'll send your first kit around the June 15.)